Temperature Calibration
THERMAL TEMPERATURE CALIBRATION
- Equipment required for a Calibration System
- Dry Block Calibrators
- Alternative “temperature” sources
- Fixed Points
- Electrical Calibration – Simulators and Sources
TEMPERATURE CALIBRATION
Temperature calibration provides a means of quantifying uncertainties in temperature measurement to optimise sensor and/or system accuracies.
Uncertainties result from various factors including:
a) Sensor tolerances which are usually specified according to published standards and manufacturers specifications.
b) Instrumentation (measurement) inaccuracies, again specified in manufacturers specifications.
c) Drift in the characteristics of the sensor due to temperature cycling and ageing.
d) Possible thermal effects resulting from the installation, for example thermal voltages created at interconnection junctions.
A combination of such factors will constitute overall system uncertainty. Calibration procedures can be applied to sensors and instruments separately or in combination.
Calibration can be performed to approved recognised standards (National and International) or may simply constitute checking procedures on an “in-house” basis. Temperature calibration has many facets, it can be carried out thermally in the case of probes or electrically (simulated) in the case of instruments and it can be performed directly with certified equipment or indirectly with traceable standards.
Thermal (temperature) calibration is achieved by elevating (or depressing) the temperature sensor to a known, controlled temperature and measuring the corresponding change in its associated electrical parameter (voltage or resistance). The accurately measured parameter is compared with that of a certified reference probe; the absolute difference represents a calibration error. This is a comparison process. If the sensor is connected to a measuring instrument, the sensor and instrument combination can be effectively calibrated by this technique. Absolute temperatures are provided by fixed point apparatus and comparison measurements are not used in that case.
Electrical Calibration is used for measuring and control instruments which are scaled for temperature or other parameters. An electrical signal, precisely generated to match that produced by the appropriate sensor at various temperatures is applied to the instrument which is then calibrated accordingly. The sensor is effectively simulated by this means which offers a very convenient method of checking or calibration. A wide range of calibration “simulators” is available for this purpose; in many cases, the operator simply sets the desired temperature, and the equivalent electrical signal is generated automatically without the need for computation. However this approach is not applicable to sensor calibration for which various thermal techniques are used.
Officially recognised (accredited) calibration laboratories are authorised to perform certain types of calibration and to issue the appropriate certificate. Such calibrations are carried out in accordance with appropriate standards, for example UKAS in the U.K. and DKD in Germany. The certificate issued for each sensor will state any calibration error which is measured at the various test temperatures and the uncertainties which exist in the measurement system used for the calibration.
THERMAL TEMPERATURE CALIBRATION
Essentially the test probe reading is compared with that of a certified reference probe whilst both are held at a common, stable temperature. Alternatively, if a fixed-point cell is used, there is no comparison with a certified thermometer; fixed point cells provide a highly accurate, known reference temperature, that of their phase conversion.
Equipment required for a Calibration System
The equipment required to achieve thermal calibration of temperature probes is dependent on the desired accuracy and ease of use. The greater the required accuracy, the more demanding the procedure becomes and of course, the greater the cost.
The required equipment generally falls into one of three groups:
1. General purpose system for testing industrial plant temperature sensors will usually provide accuracies between 1.0°C and 0.1°C using comparison techniques.
2. A secondary standards system for high quality comparison and fixed-point measurements will provide accuracies generally between 0.1°C and 0.01°C.
3. A primary standards system uses the most advanced and precise equipment to provide accuracies greater than 0.001°C
A typical general-purpose system comprises:
- A thermal reference (stable temperature source)
- A certified Pt100 reference probe completes with its certificate.
- A precision electronic digital thermometer, bridge or DVM (digital voltmeter)
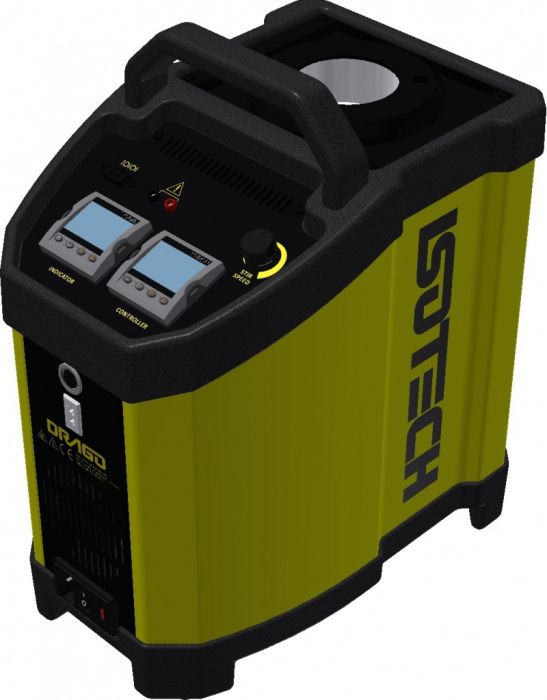
A convenient form of thermal reference is the dry block calibrator. Such units are available with various ranges spanning from -50°C to +1200°C and have wells to accept various test and reference probe diameters. Alternative temperature sources for comparison techniques include precisely controlled ovens and furnaces and stirred liquid baths.
Dry block calibrators provide the most convenient, portable facilities for checking industrial probes and they usually achieve reasonably rapid heating and cooling. The units consist of a specially designed heated block within which is located an insert having wells for the probes. The block temperature is controlled electronically to the desired temperature. The whole assembly is housed in a free-standing case. Although the block temperature is accurately controlled, any indication provided should be used for guidance only. As with any comparison technique, a certified sensor and indicator should be used to measure the block temperature and used as a reference for the test probe.
Two types of unit are available; portable units which can be taken on to plant for on-site calibration and laboratory units to which industrial sensors are brought as required.
Fig 38: Dry Block Calibrator
Alternative “temperature” sources
Many laboratory furnaces and ovens are available which are specially designed for temperature calibrations. Precisely controlled, they feature isothermal or defined thermal gradient environments for probes.
Stirred liquid baths provide superior thermal environments for probe immersion since no air gaps exist between the probe and medium. Thermal coupling is therefore much better than the alternatives described and stirring results in very even heat distribution throughout the liquid.
Alcohols are used for temperatures below 0°C, water from 0°C to 80°C and oils for up to 300°C. Various molten salts and sand baths are used for temperatures more than 300°C.
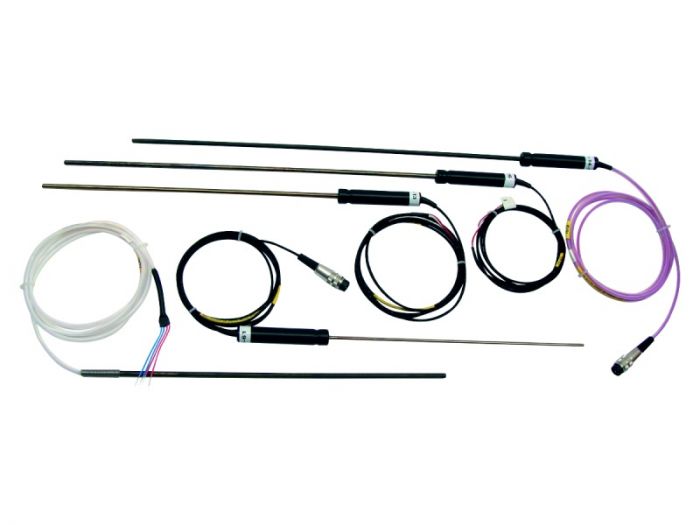
A Reference Standard Platinum Resistance Thermometer is a specially constructed assembly using a close tolerance Pt100 sensing resistor or a specially wound platinum element with a choice of Ro values. Construction is such as to eliminate the possibility of element contamination and various techniques are utilised to this end such as special sheath materials, gas filling and special coil suspension.
Fig 39: Standard Platinum Resistance Thermometer
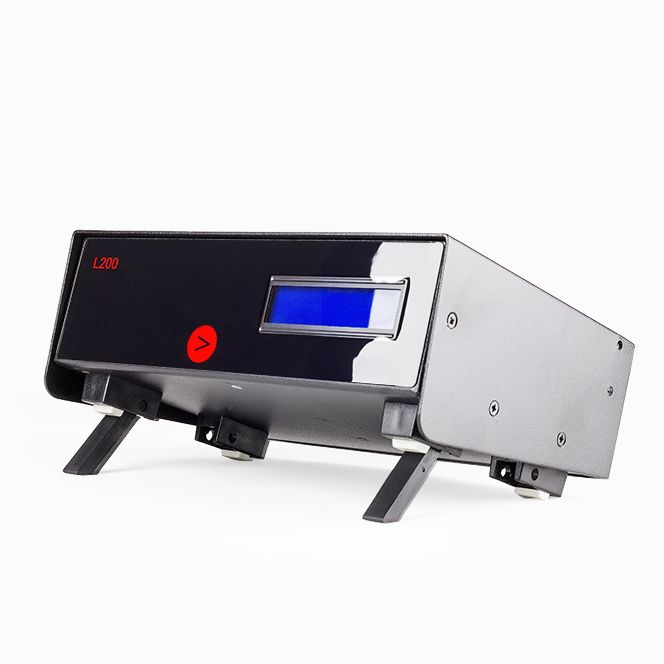
Precision Temperature indicators are available in a wide variety of configurations and with alternative accuracy and resolution specifications. Such instruments must be highly accurate and very stable. Normally, the performance of the measuring instrument will be superior to that of the reference sensor to avoid compromising the system performance. As with any measuring system, such factors must be considered when specifying system components.
Developments in high precision digital thermometry have resulted in a high level of “user-friendliness”. Features of such instruments can include built-in automatic cold junction compensation with very high stability which allows direct connection to thermocouples without the need for an ice point reference. Another benefit is that of non-volatile memory facilities for storing correction values of certified probes; when this is done, the test probe readings can be directly compared with the corrected reference probe values without the need for user computations. Such a feature enhances the accuracy on reliability of readings.
Communications for data transfer and/or remote control and PC software are sometimes available to further enhance the versatility of the modern electronic thermometer.
Fig 40: Pt100 Temperature Monitor
Thermocouple readings can alternatively be taken using a digital voltmeter; in this case, readings are displayed in microvolt units and calculations must be performed for cold junction temperature and characterisation to obtain a true temperature measurement.
PRT resistances can be measured using a precision bridge instead of a temperature indicator; again calculations must be performed to obtain temperature measurements.
Fixed points are the most accurate devices available for defining a temperature scale. Fixed point devices utilise totally pure materials enclosed in a sealed, inert environment; they are usually fragile and need to be handled with care. They work in conjunction with apparatus which surrounds them and provides the operational conditions required for melting and freezing to obtain the reference plateaux. The housings incorporate isothermal blocks with wells into which the probes are placed. Since fixed point temperatures are defined by physical laws, comparison of the test probe to a reference probe is not required.
ITS 90 Fixed points include:
|
Boiling point of Nitrogen |
-195.798°C |
|
Mercury triple point |
-38.8344°C |
|
Triple point of water |
0.01°C |
|
Melting point of Gallium |
29.7646°C |
|
Freezing point of Indium |
156.5985°C |
|
Freezing point of Tin |
231.928°C |
|
Freezing point of Lead |
327.462°C |
|
Freezing point of Zinc |
419.527°C |
|
Freezing point of Antimony |
630.63°C |
|
Freezing point of Aluminium |
660.323°C |
|
Freezing point of Silver |
961.78°C |
All such fixed-point apparatus is available commercially.
Electrical Calibration – Simulators and Sources
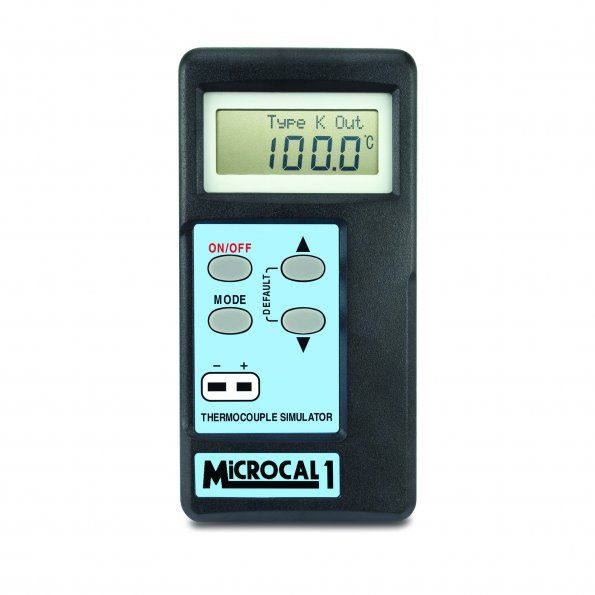
Indicators and controllers are calibrated by injecting signals which simulate thermocouples, resistance thermometers or thermistors. A simulator provides a very quick and convenient method for calibrating an instrument at many points. Very sophisticated and highly accurate laboratory instruments are available; conversely, compact, and convenient portable units are available to permit on-site checking and calibration with a good level of accuracy.
Calibrator/simulators can be either blind (without indication) or with a built-in indicator. In many cases, such instruments can be used for measuring the temperature sensed by thermocouples and resistance thermometers in addition to providing calibration signals.
Fig 41: Calibration/Simulator
Can’t find what you need? Call or email our technical sales team on +44 (0) 1243 871 280 or sales@labfacility.com for help with product selection and technical support


